Understanding the Exclaimer Console Window
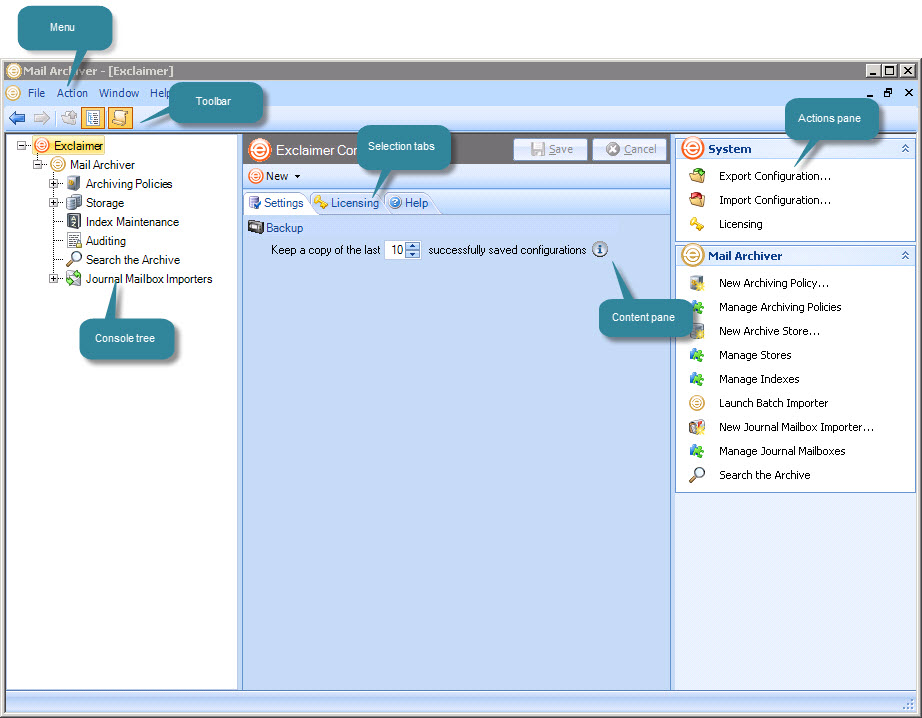
The Exclaimer console window is split into three panes, as shown and summarized below (click an image label for further information):
Exclaimer console summary
Available options in the Exclaimer console are summarized in the following sections:
Console menu
The console menu provides access to key areas and tasks within the Exclaimer console. Available options are summarized below:
|
Menu |
Summary |
|
File |
Save Use this option to save any changes made in the current content pane. Exit Use this option to close the console. If any unsaved changes are detected, you are prompted to save before exiting. |
|
Action |
New Use this option to create a new archiving policy. Export Configuration... Use this option to export current configuration settings for the console. Import Configuration... Use this option to import current configuration settings for the console. |
|
Window |
New Window Use this option to open another instance of the console - for example, if you need to refer to settings made in one tab whilst updating another. All open windows are listed at the bottom of the window menu, so you can easily switch between sessions. The new window option is also available from the actions menu. Cascade If you have used the new window option to open multiple instances of the console, use this option to display all windows in a 'cascade'. Tile Horizontally If you have used the new window option to open multiple instances of the console, use this option to display all windows horizontally, across the screen. |
|
Help |
Contents Use this option to open the help system. About Use this option to display version information for the console. |
Console toolbar
The console toolbar provides quick access to key tasks. These tasks are also available from the console menu, but have been placed on the toolbar for faster access. Options on this toolbar vary, depending on which branch of the console tree is currently selected. Those listed below are available when the top level (Exclaimer) branch is selected:
|
Option |
Function |
Summary |
|
Back |
Whilst navigating through the console tree, use this option to go back one level. |
|
|
Forward |
If you are navigating the console tree and used the back button, use this option to go forward again (i.e. to return to the point reached before you went back). |
|
|
Up |
Whilst navigating through the console tree, use this option to move up to the parent of the current branch. |
|
|
Show /Hide Console Tree |
Use this toggle option to show the console tree if it is currently hidden, or hide the console tree if it is currently shown. |
|
|
Show /Hide Actions Pane |
Use this toggle option to show the actions pane if it is currently hidden, or hide the actions pane if it is currently shown. |
Console tree
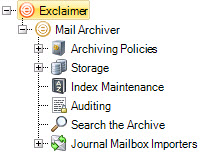
To navigate the Exclaimer console (and all applications within it), a familiar tree structure is used. The Exclaimer console is always at the topmost level, from which any number of parent / child branches (also known as nodes) are displayed. Having selected a branch from the tree, the content pane displays information and options that are relevant for that branch . Options on the toolbar can be used to quickly navigate between branches within the console tree.

|
The console tree can be hidden or shown using the hide / show console tree button on the toolbar. For quick navigation, use back, forward and up buttons from the toolbar. |
Content pane
Having selected a branch in the console tree, any information and settings associated with that branch are displayed in the content pane. These settings are accessed using a series of selection tabs at the top of the pane.
Selection tabs
Information and settings are organized into a series of tabs, accessed from the top of the content pane. Available tabs vary, depending on which branch of the console tree is currently selected. Those shown here are available when the top level (Exclaimer) branch is selected (settings and licensing).
Actions pane
The Actions pane is available throughout the system and displays quick access to common tasks, as summarized below:
|
Action |
Select this option to... |
|
System |
|
|
Export Configuration... |
Export all settings - see the export configuration... page. |
|
Import Configuration... |
Import a previously exported configuration file - see the import configuration... page. |
|
Licensing |
Access the licensing tab to view licensing information. |
|
Mail Archiver |
|
|
New Archiving Policy |
Use this option to create a new archiving policy. |
|
Manage Archiving Policies |
View and manage existing Mail Archiving policies. |
|
New Archive Store |
Run the new archive store wizard to create a new archive store (into which specified messages will be archived, as determined by archiving policies). |
|
Manage Stores |
View and manage existing archive stores. |
|
Manage Indexes |
View and manage existing indexes. |
|
Launch Batch Importer |
Use the batch importer wizard to import messages from a given source location into an Exclaimer Mail Archiver store. |
|
New Journal Mailbox Importer |
Run the new journal mailbox importer wizard to create a new journal mailbox importer which will continually move messages from an existing Exchange journal mailbox into the specified archive store(s), as determined by archiving policies. |
|
Manage Journal Mailbox Importers |
View and manage existing journal mailbox importers. |
|
Search the Archive |
Access search options within the Exclaimer Console. Note that users without access to the Exclaimer console can use the web search facility to search for archived messages. |
|
The actions pane can be hidden or shown using the hide / show actions pane button on the toolbar. |


