Importing PST Files
To import a PST file, follow the steps below:
-
Select launch batch importer from the actions pane in the Exclaimer console to start the Exclaimer Mail Archiver batch importer at the welcome page (alternatively, the batch importer can be launched from the Windows start menu):
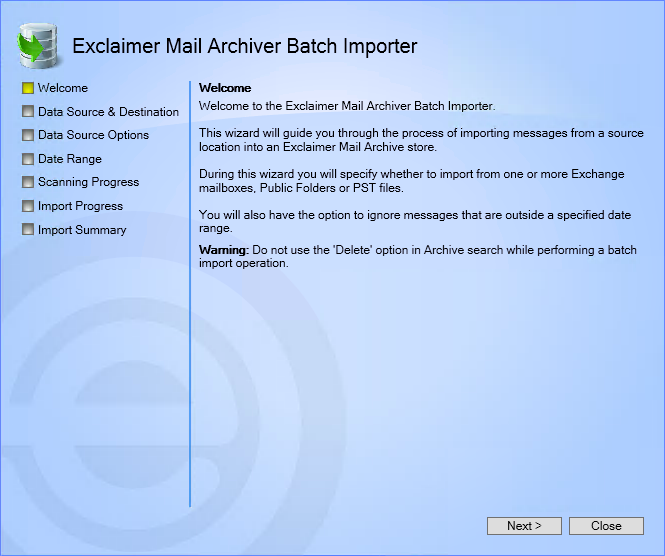
The actions pane cannot be displayed if the search window is currently open in the Exclaimer console. If you have been using the search facility, ensure that another branch of the console tree is selected so that you can display the actions pane and select the launch batch importer option.
-
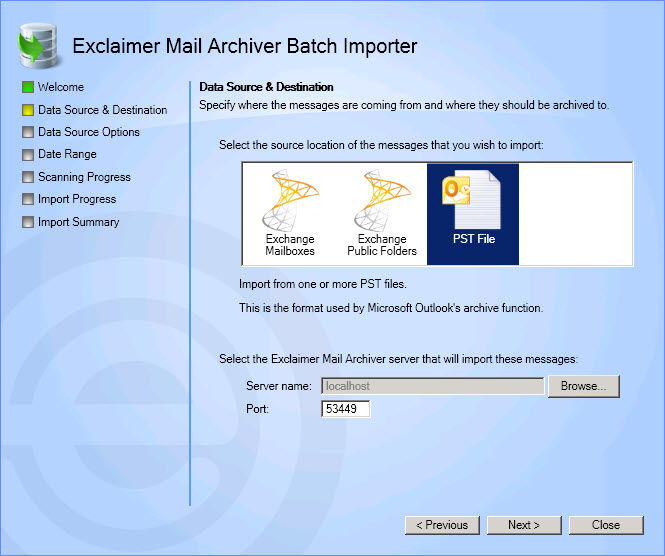
Click next to access the data source & destination page, where you can choose the required source for legacy emails:
-
Choose the PST file option.
-
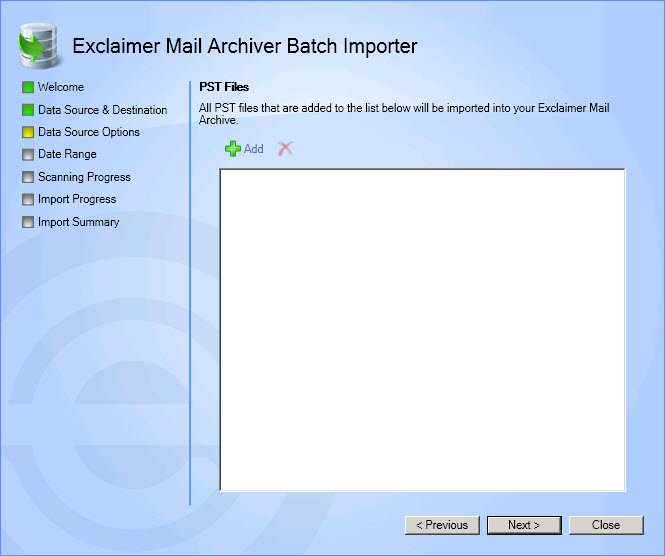
Click next to confirm selections and move to the PST files page:
-
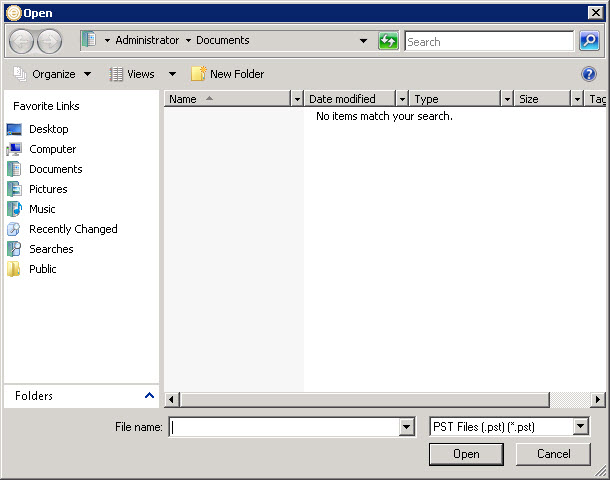
Click add to browse for the required PST file:
-
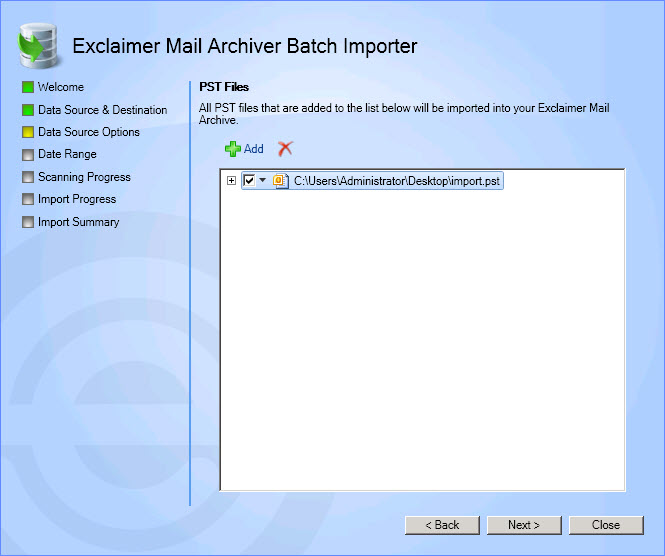
Having selected the required file, click open to return to the Exclaimer Mail Archiver batch importer. The file is added to the PST files page:
-
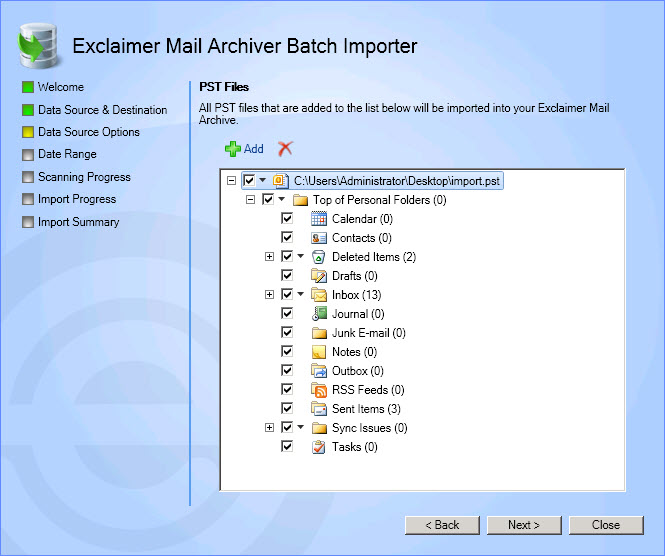
Expand the selected PST file to display the full folder structure. If required, sub folders can be de-selected (i.e. excluded from the import):
When navigating the folder structure, folders may be associated with a 'down arrow’ icon, as well as a check box. This happens when a folder contains sub folders and, when the arrow is selected, options are displayed in a pop-up menu, so you can choose what action to take when selecting the folder. This is shown in the example below:
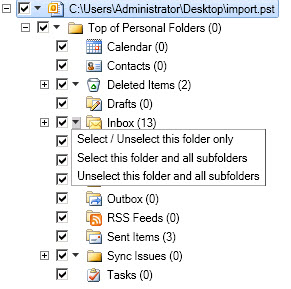
Simply click the required action from the pop-up menu to make your selection. -
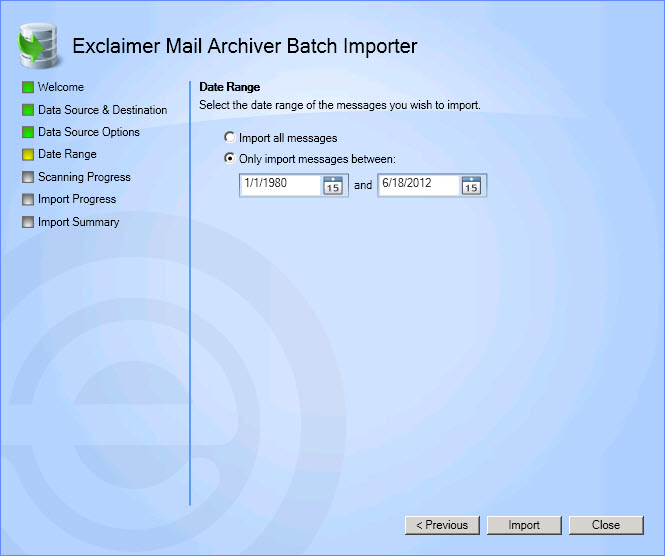
When you are satisfied with the selections made, click next to access date range options. Here, you can choose to import all messages or only those messages which fall within specified start/end dates:
-
Having set required date range options, click import to start the import process:
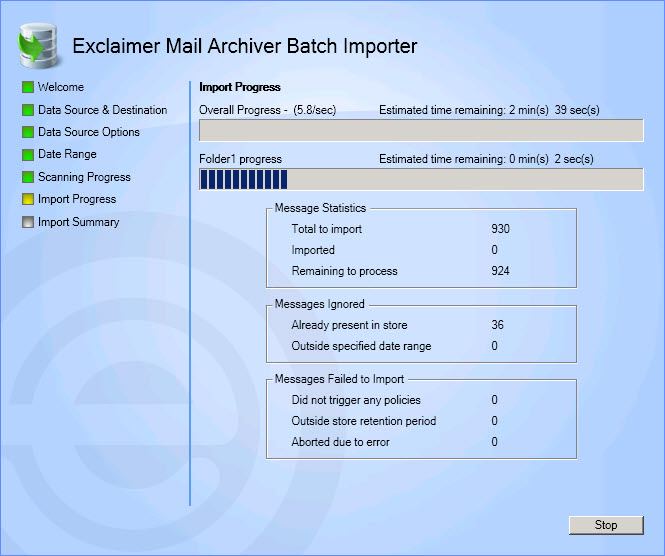
During processing, archiving policies are applied and messages are archived to the appropriate archive store. If no policies apply for a message, the message is not imported - see What happens if a legacy email cannot be archived? for further information. -
Once the import is complete, an import summary is displayed:
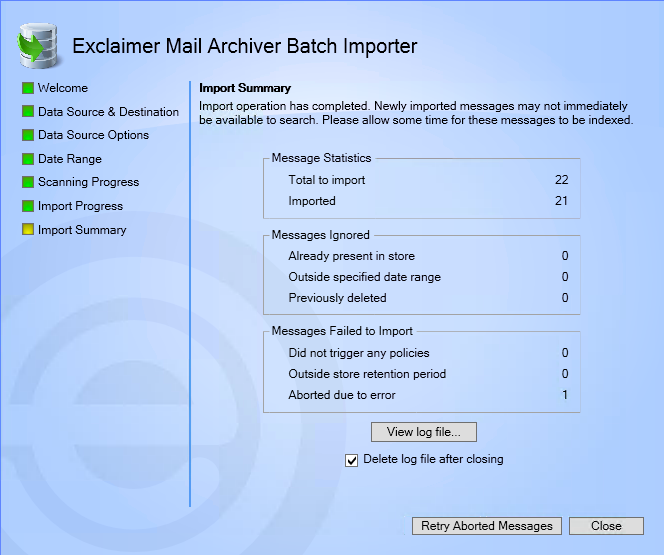
Here, you can see the total number of imported messages, together with the number of messages which were ignored and the number of messages which failed to import because no policies were triggered, because they exceed the retention period that has been set for the relevant archive store or because they were aborted due to an error. -
From here, you can view a detailed import log by selecting the view log button:
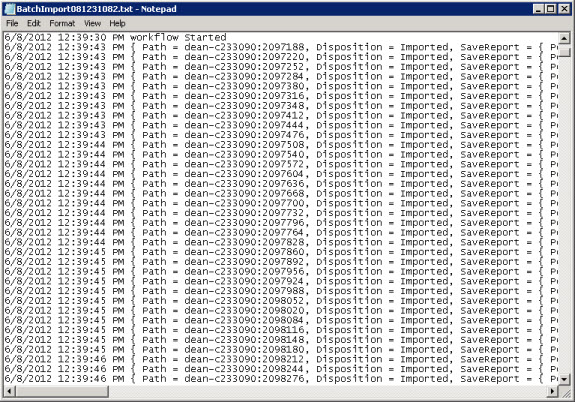
Alternatively, you can use the retry aborted messages button to try to import problem messages again. -
Click close to exit from the Exclaimer Mail Archiver batch importer.
If the delete log check box is selected, the import log will be removed. If this option is de-selected, the log will be retained in the ProgramData\Exclaimer Ltd\Mail Archiver\Import folder. If you need to contact support regarding a problem with the batch importer they will require this log file.


