Configuring Microsoft Exchange Journaling
Having installed Exclaimer Mail Archiver and run the first use wizard, options are available to select a journal mailbox - i.e. to define which Exchange journal mailbox should be monitored and archived. Any configured journal mailboxes are available for selection during the installation and setup process, and then within journal mailbox importer settings once Exclaimer Mail Archiver is run.
This topic provides instructions for using the Exchange Management console to configure Microsoft Exchange to journal messages to an account. You can choose to configure journaling for:
-
All messages:
-
Per mailbox database:
|
Note that this configuration can also be completed using PowerShell scripts, if required. For more general information about configuring a journal mailbox in Microsoft Exchange and about using PowerShell scripts please refer to the Configuring a Journal Mailbox topic. |
All Messages
Exchange 2013 and above
To configure Microsoft Exchange journaling for every message (for Exchange 2013 and above), follow the steps below:
-
Launch Microsoft Exchange admin center from the Start menu.
-
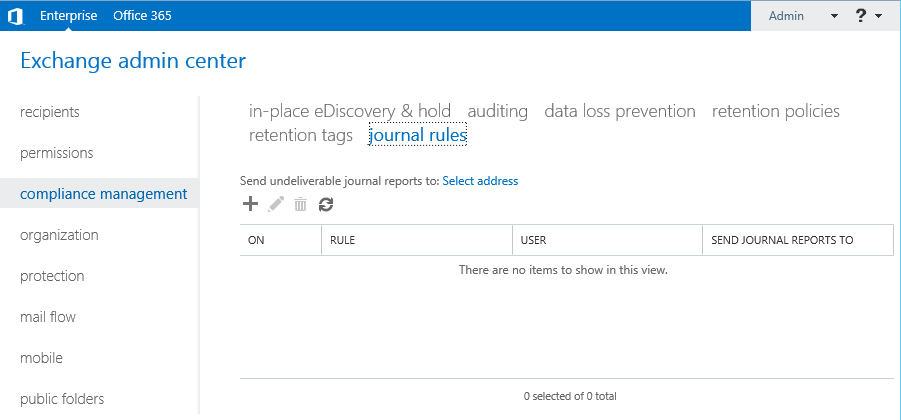
Select Compliance Management on the left-hand side, then select Journal Rules:
-
Click the plus (+) sign to add a new rule.
-
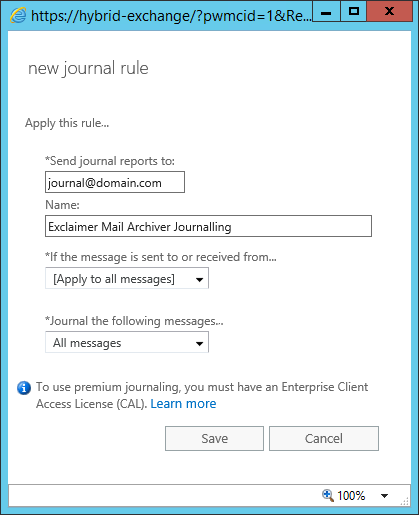
Enter a unique descriptive name for your journal rule and provide the email address for the mailbox you wish to use as the journal recipient.
-
Under If the message is sent to or received from..., select [Apply to all messages]:
-
Under Journal the following messages..., select All messages:
-
Click Save to create the new rule. In some cases, you may see the following warning:
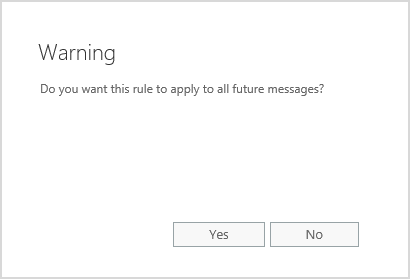
Select Yes and all messages processed by your Microsoft Exchange organization will be journaled to this recipient. You can now use the Journal mailbox to create a journal mailbox importer in Mail Archiver.
Exchange 2007 and 2010
To configure Microsoft Exchange journaling for every message (for Exchange 2007 and 2010), follow the steps below:
-
Launch Microsoft Exchange management console from the Start menu.
-
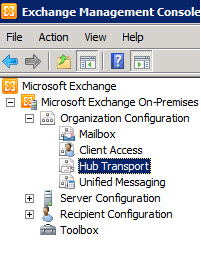
Select Microsoft Exchange > organization configuration > hub transport from the tree on the left-hand side:
-
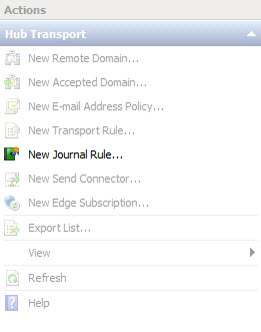
Select new journal rule… from the actions pane:
-
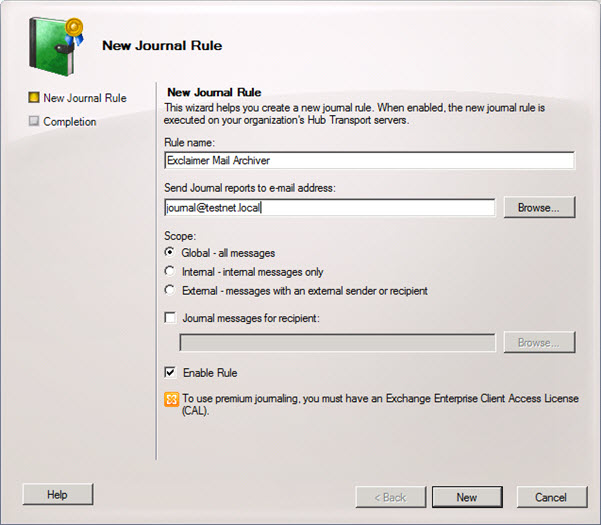
Enter a unique descriptive name for your journal rule and provide the email address for the mailbox you wish to use as the journal recipient:
-
Click new to create your journal rule.
-
Click finish and all messages processed by your Microsoft Exchange organization will be journaled to this recipient. You can then use the Journal mailbox to create a journal mailbox importer in Mail Archiver.
Per mailbox database
Exchange 2013 and above
To configure Microsoft Exchange journaling for a specific mailbox database (for Exchange 2013 and above), follow the steps below.
-
Launch Microsoft Exchange Admin Center from the Start menu.
-
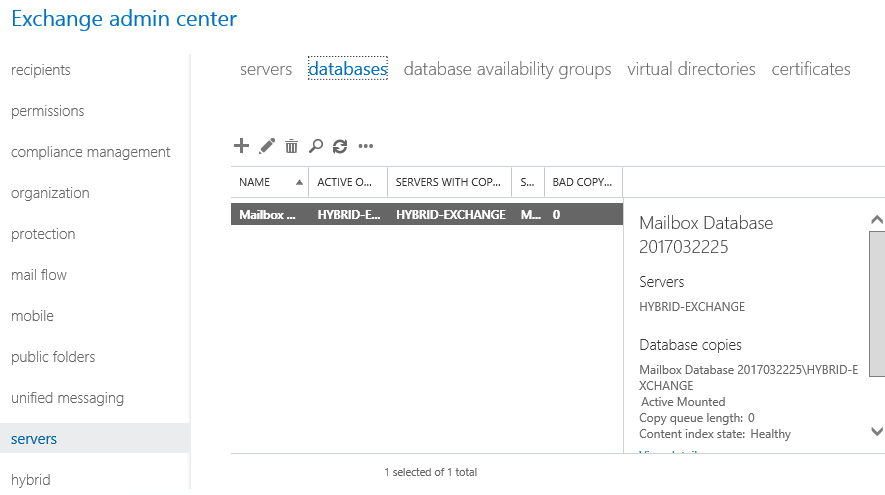
Select Servers on the left-hand side, then select Databases:
-
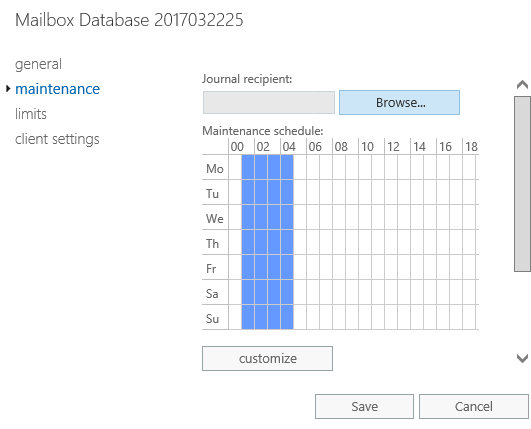
Double-click on the mailbox database that you wish to enable journaling for, and select maintenance:
-
On the maintenance tab select a Journal recipient using the Browse button - select the mailbox that you wish to use as the journal mailbox.
-
Click Save. You can now use the journal mailbox to create a journal mailbox importer in Mail Archiver.
Exchange 2007 and 2010
To configure Microsoft Exchange journaling for a specific mailbox database (for Exchange 2007 and 2010), follow the steps below.
-
Launch Microsoft Exchange Management console from the Start menu.
-
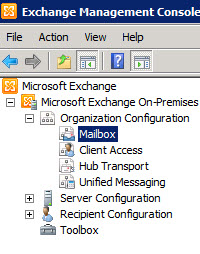
Select Microsoft Exchange > Organization configuration > mailbox from the tree on the left-hand side:
-
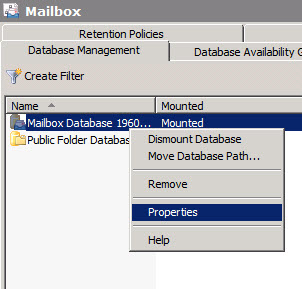
Right-click the mailbox database you wish to enable journaling for and select properties:
-
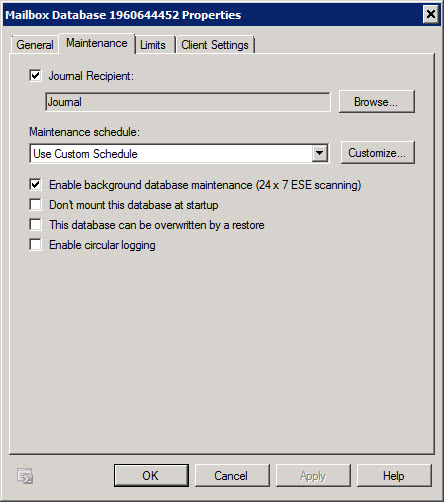
On the maintenance tab, enable journal recipient and - using the browse button - select the mailbox that you wish to use as the journal mailbox:
-
Click OK. You can then use the journal mailbox to create a journal mailbox importer in Mail Archiver.


