Signature Manager Office 365 Edition advanced options
The advanced tab contains options for user data and data aggregation:
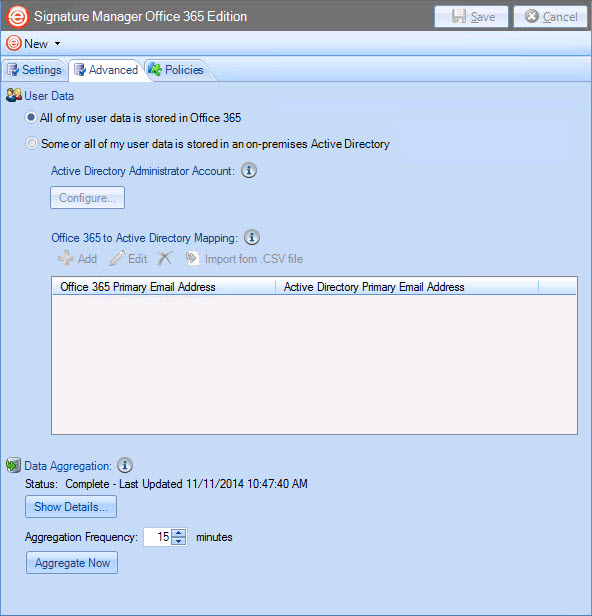
Understanding user data & data aggregation
In Exclaimer Signature Manager Office 365 Edition, signatures are defined in templates. These templates include fields (name, job title, department, telephone numbers, etc.) and these fields are populated by user data when email messages are sent.
Exclaimer Signature Manager Office 365 Edition pulls user data from Office 365 and/or an On-Premises Active Directory - this process is known as data aggregation. The data is stored in a database, so it's always available when signature content is defined (in templates) and messages are sent.
Accordingly, there are two scenarios to consider for user data:
Scenario 1
You use Office 365 for email and to maintain user data (for example: job title, department, telephone numbers, etc.). This is the most straightforward scenario and no special settings are required.
Scenario 2
You use Office 365 for email but user data is maintained in an On-Premises Active Directory for some or all users. With this scenario, you define mappings for any users where data needs to come from the On-Premises Active Directory rather than Office 365. If a mapping is defined for a user, Exclaimer Signature Manager Office 365 Edition will always pull user data from the On-Premises Active Directory when generating signatures for mapped users - not Office 365.
|
Office 365 is the primary data source for Exclaimer Signature Manager Office 365 Edition. All users (for whom signatures are required) must have an Office 365 mailbox - even if you only use these mailboxes to define mappings to an On-Premises Active Directory. |
Data aggregation frequency
Options at the bottom of the advanced tab are used to show the current data aggregation status, and to determine the frequency with which data aggregation takes place:
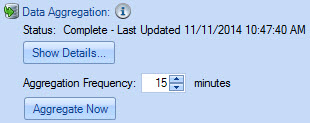
Here, you can:
-
View details for the current aggregation status by selecting the show details option.
-
Set the aggregation frequency (in minutes)
-
Click aggregate now to update data immediately
Configuring the Active Directory administrative account
Before you can define Office 365 to Active Directory mappings, you must provide details for an administrative account. To do this, click the configure button to open the Active Directory Admin window:
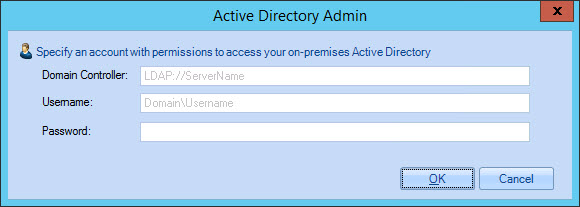
Here, enter the domain controller (if applicable) for the Active Directory, together with a username and password for the Active Directory Administrator.
|
If you wish to map some (or all) Office 365 user accounts to Active Directory accounts, you only need to specify an Active Directory Domain Controller if you install the software on a workgroup computer (i.e. a computer that is not connected to the Active Directory) and you have an Active Directory Domain. However, a more typical scenario is where Exclaimer Signature Manager Office 365 Edition is installed on a computer that is connected to the Active Directory, in which case they have a Trusted Connection and as such there is no need to specify a Domain Controller. |
Office 365 to Active Directory mappings
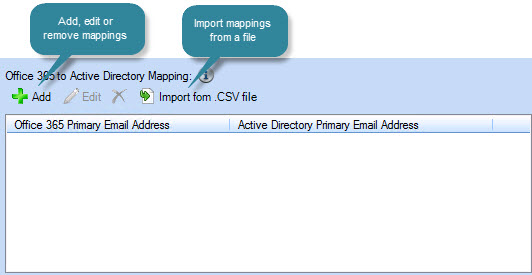
To aggregate user data from both Office 365 and your company's On-Premises Active Directory, you must define an Office 365 to Active Directory mapping for required users. Here, you enter a user's Office 365 email address and their corresponding Active Directory email address. If you need to define mappings for lots of users, you can import details from a CSV file.
Mappings are defined using options in the Office 365 to Active Directory mapping section of the advanced tab:
|
When a mapping is defined, Exclaimer Signature Manager Office 365 Edition will always pull data from the On-Premises Active Directory for these users - data is never pulled from Office 365 for mapped users. |
Adding a new mapping
To add a new mapping, select the add option to open the Office 365 to Active Directory mapping window:
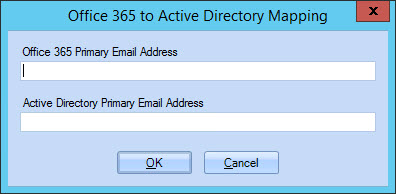
Here, enter the user's primary Office 365 email address and then the corresponding primary Active Directory email address.
|
Data is only aggregated for specified mappings if an Active Directory administrative account is configured. |
Importing mappings
If required, mappings can be imported from a CSV file. The format of this file should be one line per user in the form: Office365EmailAddress,ActiveDirectoryEmailAddress.
|
When a file is imported, any existing mappings are removed first.. |
To import a CSV file:
-
Click the import option to display the Open window.
-
Navigate to the required CSV file and select it.
-
Click OK.
Editing an existing mapping
To edit an existing mapping:
-
Select the required mapping from the list.
-
Click the edit option to open the Office 365 to Active Directory mapping window.
-
Change details as required.
-
Click OK.
Removing an existing mapping
To remove an existing mapping:
-
Select the required mapping from the list.
-
Click the remove option to remove the mapping immediately.
|
Changes are retained if you move to other tabs. When you are satisfied that all tabs have been updated correctly, click the save button to save changes across all tabs. Alternatively, use the cancel button to abandon all changes.. |


