Tables
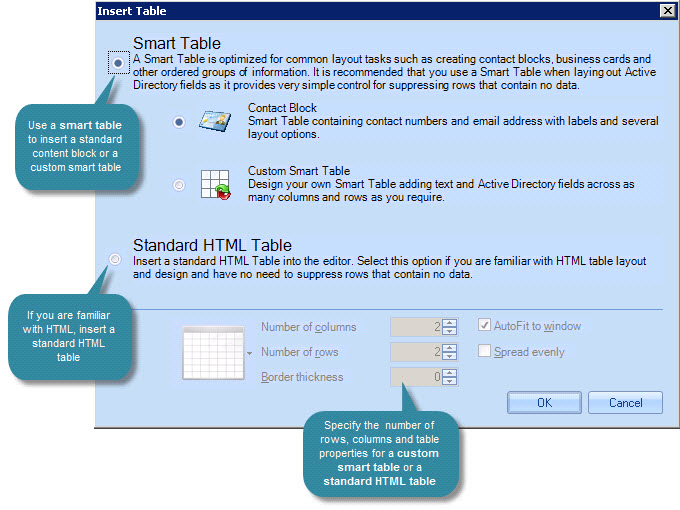
When working with HTML templates, selecting the table option from the editor toolbar displays an insert table options window:

From here, you can choose the type of table to be inserted - choose from:
These options are summarized below.
Smart table - contact block
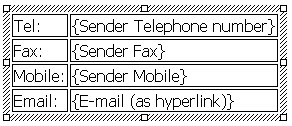
When working with templates, a common requirement is to insert standard contact information for the message sender. You can do this by adding individual fields to the template, but it can be neater and quicker to use a predefined contact block. A contact block is essentially a table of commonly used message sender fields - for example:

A key benefit of using a contact block rather than individual fields is that you can choose to suppress a row if there is no information in the message sender's Active Directory information to include. For example, if a contact block includes a {fax} field but there are no fax details for a message sender, the 'fax' row of the block is not displayed when the message is sent,
Once inserted, a contact block can be edited - for example, you might wish to swap one field for another, or adjust the formatting (using properties). For further information, please see how do I create a contact block?.
|
When the contact block is selected from the insert table options window, table rows and attributes are not available. This is because the contact block is a predefined table, however you can adjust the table once it has been inserted into the template. |
Smart table - custom
The custom smart table option can be used to insert a table and specify content / attributes using straightforward data entry fields. This is a quick and easy way to insert a table and include Active Directory fields (or other content) at the same time; the alternative would be to insert a standard HTML table and add fields or other content manually.
For further information, please see the smart tables page.
Standard HTML table
If you wish to insert a standard HTML table and do not wish specify any content until after it has been added to the template, use the standard HTML table option. This is useful (for example) if you wish to insert a basic table to form the layout of a template, or if you wish to include tabular data which does not include fields.
Having selected the standard HTML table option from the insert table window, you can set the number of columns and rows, together with border, autofit and spread attributes. Then, click OK to insert the table and start to add content.
|
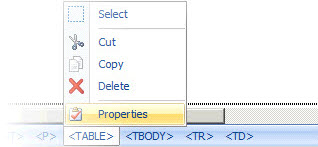
When working with any kind of table in the HTML template editor, it may be useful to note the 'HTML element trail' at the bottom of the editor window.:
Depending on the size of your table, it can sometimes be tricky to select a particular row, column or cell, but you can do this very easily from the element trail - just click the required element. When you click on an element, further options are displayed:
Selecting properties will show properties for this table element in the properties pane.. |


