Defining an Outlook rule to manage address tags
When someone decides to use address tagging, it is likely that they will manage messages received for these tags using Outlook rules. Rules can be defined to filter incoming messages, allowing you to take a range of actions when a given set of criteria are met. Commonly, people define rules to copy/move messages for a given tag to a specified folder, or to delete messages received for a tag that they are no longer interested in.
The following example shows how to create an Outlook rule to delete messages received for a tagged address. For more detailed information about defining these rules, please refer to Outlook's own help resources.
|
If an Outlook rule does not prove sufficient for any reason, you can request that a tagged address is added to the blocked addresses list in Exclaimer Address Tagging for Exchange. This needs to be done by a system administrator. |
Deleting messages for a tagged address using an Outlook rule
To define an Outlook rule to delete messages received for a tagged address, follow the steps below:
-
Open Outlook.
-
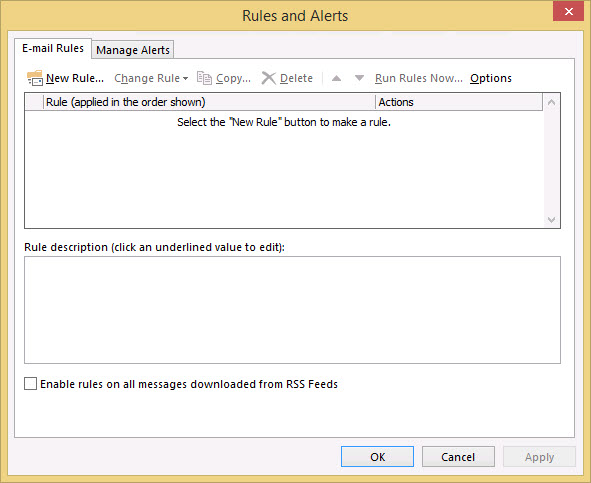
Select Manage Rules and Alerts to open the Rules and Alerts window:
-
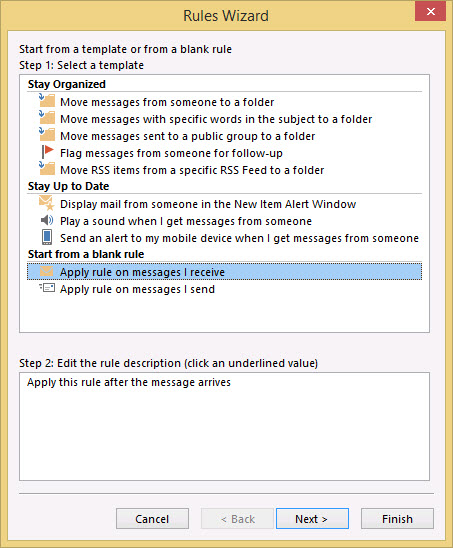
Select New Rule to open the Rules Wizard window:
-
Choose Start from a blank rule > Apply rule on message I receive. Options for this rule are displayed:

-
Select sent to people or public group.
-
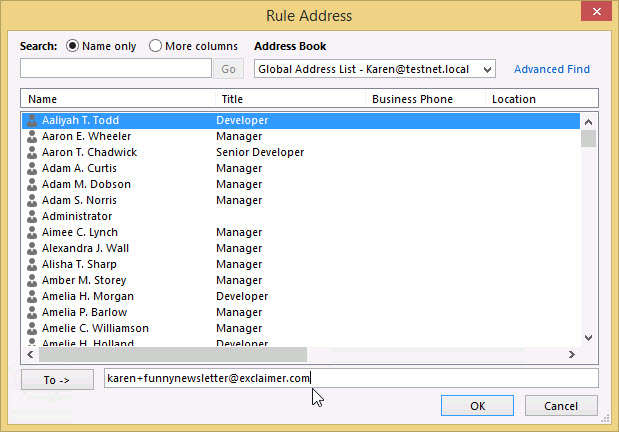
Move to the lower pane and select the people or public group link. The Rule Address window is displayed:
-
Move to the bottom of this window and enter the required tagged address in the To field.
-
Click OK to exit back to the Rules Wizard window.
-
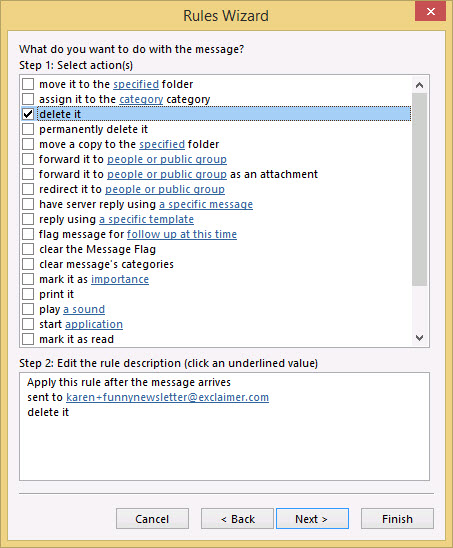
Click Next to view a list of actions that can be taken with matched messages:
-
Select the delete it option (if you don't want to delete these messages, you can choose another action here).
-
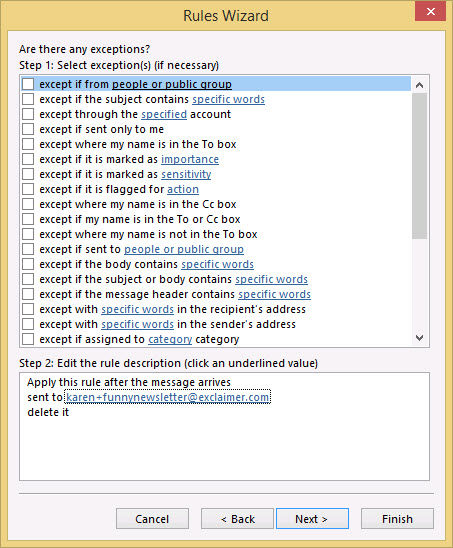
Click Next to access 'exception' options for this rule. If required, you choose one or more exceptions to apply:
-
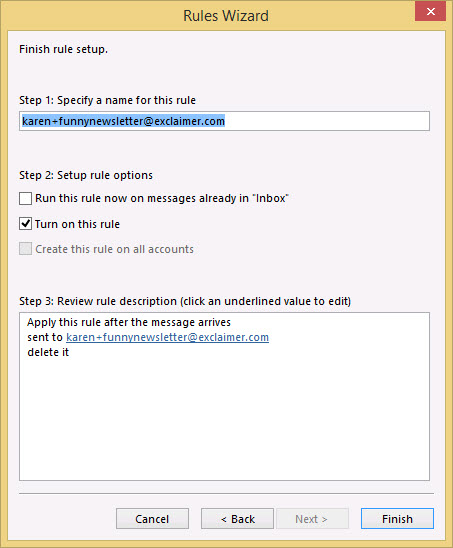
Click Next to access the final setup window:
-
If required, change the name of the new rule, then ensure that it is switched on.
-
Click Finish to exit back to the Rules and Alerts window.
-
Click OK to exit back to Outlook.
|
This page describes the process for Outlook 2013 and 2016. Earlier versions of Outlook may have different options, however the same principles apply. |


