About the Windows registry
The process required to control which aliases are available to users in Outlook requires modifications to the Windows registry - specifically, adding/updating paths and keys. This section may be useful if you are not familiar with the Windows registry.
|
Serious problems might occur if you modify the Windows registry incorrectly, therefore care should always be taken when you are working with the registry editor. We strongly advise you to back up the Windows registry before any modifications are made - see backup the Windows registry for further details. |
Accessing the Windows registry
To control which aliases are available to users in Outlook, you will need to access the Windows registry on any client computers where the Exclaimer Email Alias Manager for Exchange Add-in is installed.
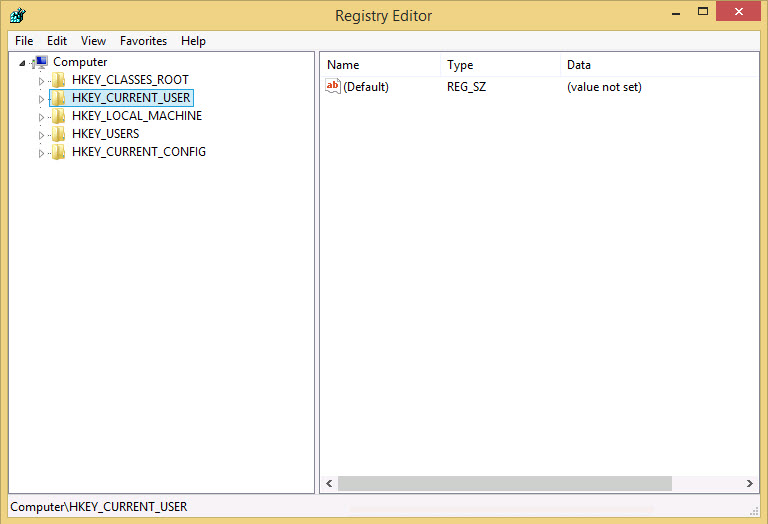
To open the Windows registry for a computer, access the Run option in Windows and then enter: regedit. Alternatively, you can use the Windows search option to search for regedit and then select regedit.exe when found. The registry editor window will look similar to the example below:

Understanding paths
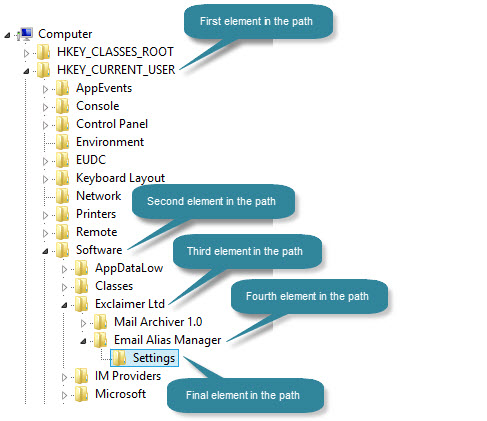
Registry paths are simply a hierarchical structure of nodes within the Windows registry. For example, the path HKEY_CURRENT_USER\Software\Exclaimer Ltd\Email Alias Manager\Settings is shown in the Windows registry as follows:

Here, you can see that every element in the path is represented by a node (known as a key) in the Windows registry.
Creating paths by adding keys
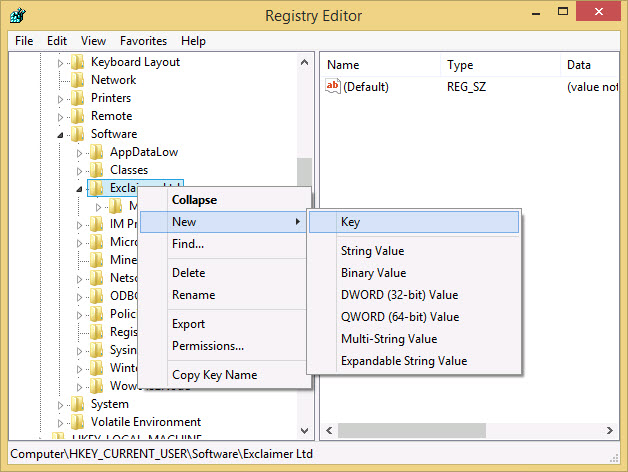
If you reach a point in a specified path that does not exist, you can create it (right-click and choose new > key).

Adding keys
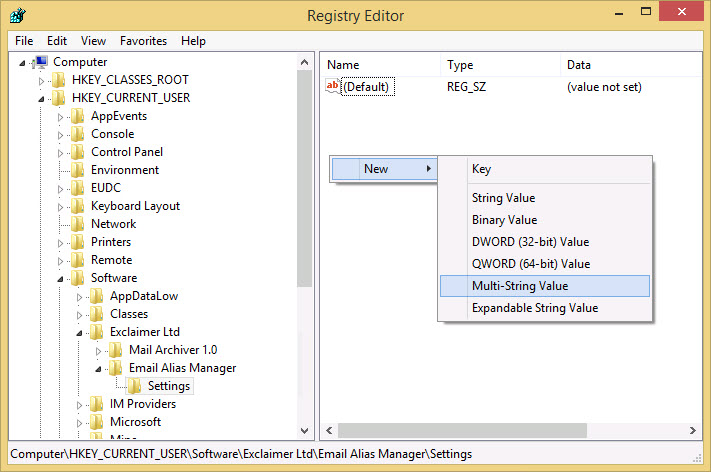
Having navigated to the required path, you can define keys. To do this, ensure that the correct key is selected (i.e. that you are at the right point in the path) and then right-click:

Choose the type of key that you wish to add (for this task, you will only require DWORD and Multi String Value options). Having selected a key type, a new entry is made so you can enter the appropriate name:

Having entered the required name (for example: IncludePatterns), double click it and enter the associated value.


